
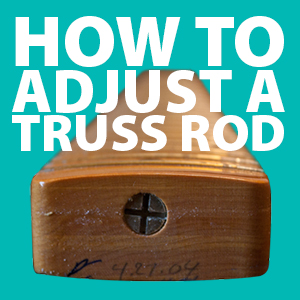
 Learning how to adjust your guitar truss rod is one of the most important steps in setting up your guitar. Without a straight neck, you guitar will most likely be difficult to play and will probably be impossible to tune.
Likewise, if you don’t know how to do a proper truss rod adjustment, you could make your guitar play worse or even break your neck altogether. That’s why I wrote this article. I walk you through all the steps to straightening your guitar neck truss rod.
Before we adjust the truss rod, we should take a look at what its purpose is in a guitar neck.
What is a Guitar Truss Rod?
Contents
A truss rod, essentially, is a metal rod that is inserted into a channel or cavity in your neck to help with reinforcement. It stiffens your neck and helps eliminate relief and back-bow in the neck. More “modern” truss rods not only help reinforce the neck but also help bend the neck back into a straight position.
Truss rods have changed quite a bit since Martin first introduced their non adjustable design back in the early 20th century. These rods were often a T-bar or piece of square tubing inlayed in your neck. The only real purpose of these T-bar rods was to stabilize your neck and keep it from bowing. If the neck did bow because of extreme weather conditions or faulty craftsmanship, there was nothing you could do to fix your neck short of tearing it apart, straightening your neck, and inserting a new T-bar rod. It’s kind of crazy to think that Martin used these non-adjustable truss rods up until 1984. Here is a little more history about Martin Guitars.
Today, almost all guitars are fitted with adjustable truss rods that can be adjusted using an allen wrench or screw driver in either the nut or the heel of your neck. Electric guitar truss rods come in two main styles: single action or one-way truss rods and dual action or two-way.
In short single action truss rods bend the neck one way when it’s tightened. Loosening a single action rod will not “bend” your neck in the other direction; it simply relieves the pressure from the neck and allows the string tension to pull the neck in the opposite direction.
A dual action truss rod, on the other hand, does actually bend your guitar neck in both directions. Tightening or loosening a dual action rod will bend cause the truss rod to bend in either direction. Check out the single action vs. dual action page for more info.
Truss Rod Adjustment Tools You’ll Need
Here is a list of tools you’ll need to adjust your truss rod and make your guitar neck nice and straight.
Truss Rod Wrenches
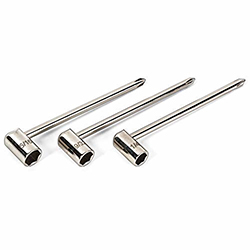 Most Stats and Gibson guitars use nut to straighten the neck. There are three common sizes of nuts that most guitars use, so here is a set of the three most common sizes.
TrussRod Wrench Set
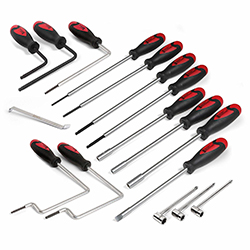 Most trussrods use either a nut or socket headed cap screw to tighten or loosen them. Unfortunately, they come in all different sizes and shapes. So if you are anything like me, you will need a big variety of wrenches to straighten all of your different guitar necks. Here is the ultimate set. You will be able to adjust any guitar with this set!
Notched Straight Edge
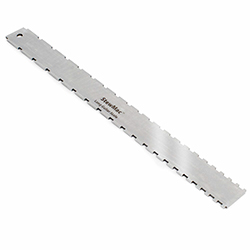 The absolute best way to get an accurately straight neck is to use a straight edge. This way you can easily measure how much relief or back bow your neck has. A notched straight edge is design to go over the frets, so you can measure the neck itself without any interference from the frets because the frets can be different heights that will give you false readings. Using one of these is the only way to get an accurately flat neck.
Steps for Adjusting an Electric Guitar Truss Rod
Step 1: Check the relief or back-bow in the your guitar neck
With a straight edge
Checking the straightness of your neck is relatively simple if you have a straight edge or a notched straight edge. Simply play the straight edge against your frets or fretboard and shine light behind it. If your neck is not straight, light will shine through the gaps.
Without a straight edge
If you do not have a straight edge, you can simply use your strings as a straight edge. Press down the string at the first fret and press down the string on the fret where the body and neck meet. The string will become a straight line between the two frets. You may want to use capos to hold the string down. Once the string is fretted on two frets, you can measure the distance between the frets and the string with feeler gauges. If there is relief in the neck, the 6th or 7th fret will have the most distance between the string and the fret. The distance between the string and frets will decrease the closer you get to the capoed frets. The opposite will be true if your guitar neck has back-bow. If the distance between all the frets and the string are equal, the neck is straight and does not need to be adjusted.
Remember as I wrote on the action adjustment page, there is no right or wrong amount of relief in your neck to an extent. Usually a slight amount of relief is appropriate. Just like anything else in adjusting guitars, neck relief is a player’s preference. It depends on the style of instrument and player. You should try to adjust your truss rod until your guitar neck is flat and play it. Then you can continue to add a slight amount of relief until your neck feels comfortable. Since the neck changes with the seasons, this adjustment will be fairly often. You will get used to how much relief you prefer in your neck. The average relief at the 7th fret is about .007 inches.
Step 2: Adjusting the Truss rod
 Before we do anything I want to warn you. BE VERY CAREFUL. Do not over tighten the truss rod. Remember the truss rod is a piece of metal that is in charge of applying pressure to bend your guitar neck. If you over tighten it, you can cause any number of problems including snapping it, warping the fretboard, or even twisting your guitar neck. All of these problems are rather involved and expensive repairs. It is best just to be careful and not over tighten the it in the first place.
A good thing to do before following the steps below is to loosen your rod a full turn and measure your guitar neck to see what happens. If the truss rod is already all the way tightened and the neck still has relief in it, you may break something by continuing to tighten it. Backing off the tension will give you an idea of how tight the rod is before you start the adjustment.
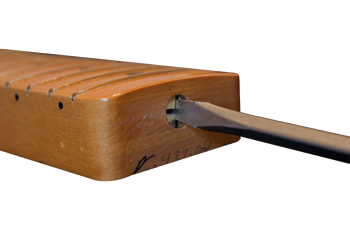
There are two basic styles of truss rod placement: Fender Telecaster and Gibson. The Fender Telecaster style placement has access to the rod in the heel of your guitar neck, while the Gibson style has access in the headstock/peghead. Enough talking about theory. Let’s straighten your guitar neck!
How to Adjust a Fender Telecaster Truss Rod
Fender Telecaster and Stratocaster truss rods are often only accessible at the bottom of your guitar neck. These truss rods can’t be adjusted while the neck is still bolted to the guitar because the screw head or allen head is partially hidden by the body. In order to adjust your Fender style rod, you’ll have to partcially or completely remove your neck from the body. Don’t worry. It’s not as bad as it sounds. Here are the steps to adjusting your Telecaster and Stratocaster truss rod.
- Loosen the strings.
- Loosen the two neck bolts farthest away from the headstock/peghead all the way.
- Loosen the two neck bolts closest to the peghead 1/3 of the way.
- Carefully, pry back your guitar neck away from the body exposing the truss rod screw.
- Use a flat-head screwdriver to turn the truss rod screw right or left. BE VERY CAREFULLY of the screwdriver hitting the body of the guitar. Also, be careful not to slip with the screwdriver and dent the body. Only turn the screw 1/8 of a turn at a time. Tighten the screw to eliminate neck relief and add back-bow. Loosen the screw to add relief in the neck.
- After you have turned the screw 1/8 of a turn, tighten the neck bolts and retune the guitar. It is important to have tension on the neck. Without the string tension on the neck, you cannot see the extent to which you are moving the neck with each truss rod adjustment. Then you can measure the relief in the neck.
- Repeat these steps as much as necessary until your guitar neck is straightened.
If you do not feel comfortable prying back the neck while the neck is partially attached, you may completely remove the neck and make your slight adjustments; however, you will not be able to check your adjustments until you reattach the neck, retune the guitar, and measure the relief. This way will just take more time, but it can be done. It’s kind of a pain to do it this way, but the important thing is your guitar will be safe if you take your time.
How to Adjust a Gibson Les Paul Truss Rod
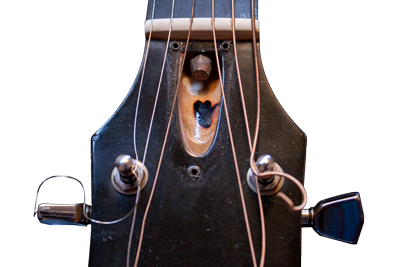
The Gibson style truss rod is accessible through the headstock/peghead. This is much easier to adjust than the Fender style rods. Most guitars today have adopted the Gibson style rod because its easier to make the adjustments with the access point in the headstock/peghead. Most guitars also have a decorative cover to hide the access hole on the headstock. Here are the steps to adjusting a Gibson style truss rod.
- Tune the guitar to pitch. It is important to have tension on the neck. Without the string tension on the neck, you cannot see the extent to which you are moving the neck with each adjustment.
- Remove the truss rod cover by unscrewing the screws with a micro-screwdriver.
- Lubricate the nut if possible/necessary.
- Gibson truss rods often have several different ends including a nut, screwhead, and allen head. You might have to use a nut driver, screwdriver, or allen wrench for this adjustment depending on your guitar. Only turn the rod 1/8 of a turn at a time. Tighten the screw to eliminate neck relief and add back-bow. Loosen the screw to add relief.
- After you have turned the screw 1/8 of a turn, retune the guitar. It’s important to have tension on the neck because the truss rod is designed to counter act the tension of the strings. Without the string tension, your adjustment might be off. Then you can measure the relief in the neck.
- Repeat these steps as much as necessary to straighten your neck.
- Replace the truss rod cover.
With all truss rod adjustments, do not drastically adjust the rod. Sometimes it takes time for your neck to settle into its new shape. If it feels like you keep having to tighten or loosen your guitar neck for a single adjustment, retune the guitar to pitch and let it sit for a few minutes. This will give it time to settle into its new shape.
Truss Rod Adjustment Tips
Remember, the truss rod adjustment is only one step in lowering or adjusting the action on your guitar.
Do not keep tightening or loosening the rod if your guitar action is not ideal. All the truss rod does is straighten the neck. I laid out rest of the steps to completely set the action on your guitar on the guitar action adjustment page.
I CANNOT stress enough to be careful during any truss rod adjustment. There are many highly involved and expensive problems that you can cause by tightening it too much.

Thanks for the great info on setting up the intonation on a Gibson Les Paul–including the truss rod adjustment. That was a big help. Every other site pretty much just covered adjusting the length on the saddle for each string. That was not enough to help much on my new guitar. Your info on straightening the neck and getting the bridge height lower took me much closer to a vastly improved overall intonation. Not perfect yet, but much better. By far, you had the best info I found anywhere. Thanks again.
Trying to adjust truss rod on a Goya G410 12 spring acoustic. The rod seems to be frozen. Can not move in either direction. Any ideas on feeing up the rod.
Try some 3in1 oil on the truss road, only a drop two, stand guitar upright and oil will work its way down rod, maybe overnight. DO NOT muscle and turn it as it may break which is a costly repair.
In fact, maybe a repair visit now as they are used to this challenge and will fix any harm they may do, yeah i vote for this.
St
Good luck
Hi, First of all i found this article extremely helpful so thank you.
Just a quick one really… i hope lol. When adjusting the Gibson style truss rods, is there a universal standard for which direction tightens or loosens the rod? Or is it more a case of maybe trial and error, making minor adjustments first in small increments in either direction to gauge the truss position?
Finally, if its the case that most guitars are different dependent on the manufacturer. can you suggest any forums/sites where people have collectively shared their various truss knowledge?
Thank you for your time!!
J
Not saying which way to tighten or loosen the truss rod seems like major error
righty tighty, lefty loosey 🙂